Wikipedia does not have a listing for end table and does not mention them in the body of the text for the entry for Table (furniture). As a result I will have to link to a different source for an end table definition for the edification of the random internet hobos that pass through here. The key thing to remember is that end tables are not the same thing as nightstands. As we have learned from the Song of the Sorcelator, nightstands are much more dangerous and caution is recommended in both construction and use. Rather than consort with dark’st powers I have decided to construct an end table to teach myself some wood working basics. The ultimate goal is to learn skills enough to fabricate a set of built-in bookshelves for my study. This project is so far about a year and a half in the making and has not yet witnessed the cutting of the first book shelf board.
The primary reason for the abject lack of progress is the year and a half that I spent playing World of Warcraft. The game is
wonderful and magical and allows its subscribers fantastic entertainment and money saving opportunities via powerful, addictive feedback mechanisms. If you are playing the video game five to six hours a night and more on the weekend there isn’t much chance you’re going to pop down to the Home Despot and pick up a few sheets of plywood or spend an evening downtown with your friends trading your credit card for fire water and lung cancer. Of course eventually your friends will stop calling you and your bookshelves will never get made and you’ll just sit at the computer you moved into the living room pretending to be an elf while the world passes you by. The game is not, however, a perfect prison. The critical flaw is that it causes you to interact with other people who also play the game and it is this interaction with other WoW players that enables escape. There are a lot of really awful people on the internet and a sizable percentage of them are logged into WoW right now. At some point you have had alls you can stand and you can’t stands no more and then you stumble, blinking and swearing into the Big Room and wonder who killed your yard.
So, end table. I bought a new couch at some point during my vacation from the real world and I would like to have some other living room furniture to go with it. One of my innumerable character flaws is that I will imagine a piece of furniture or a decoration or some other object and then be unable to buy something to fill the space because nothing perfectly matches the idea in my head. An end table is a relatively simple thing to draw up and should then be easy to construct from the plans so the thought goes, “Why couldn’t I just build exactly what I want?”
I sketched a few design ideas, came up with one I liked and then drew up a plan. It’s probably not going to be the sturdiest thing in the world when it’s done. There are several joins that are not as strong as they really should be but it is pleasing to the eye and I am capable of making all the parts with the equipment which I currently own. After I drew the schematic I determined what different pieces made up each component and made a cutting diagram and a materials list and went shopping. It was about $150 in wood and I’ve since spent probably another $100 in sand paper, stain, finish, and other odds and ends. All told I’ll likely have $300 invested in it. A nice hardwood table would probably be in that price range so I haven’t screwed myself too badly apart from the substantial time investment.
 The current state of the project is that all of the pieces have been cut and have had the joins dry fit together and it seems to be an actual table which could conceivably hold up more than its own weight. I have some pictures of the complete dry fit test here. I got the coppermine gallery software installed so now everything can be hosted here and you don’t have to wade through a bunch of flash ads about refinancing your house to see stuff.
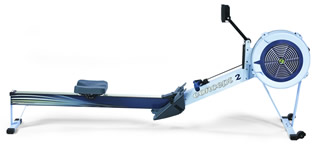
Since then I have glued up the individual legs, side panels and the top (and started rowing, also a big time investment, see below). The riser the top sits on and the lattice work is not yet glued. I will probably wait to glue the lattice until each piece is sanded and stained to prevent the nightmare that it would be to work on after gluing. I’ve also done the first sanding pass on two of the side panels. I’ll need to run the legs through the saw one last time to square off any irregularities arising from the gluing and then they’ll be sanded too. They should be easier to sand than the panels too as they’re basically just blocks.
- To do list:
- Glue tabs into top
- Glue riser (make sure it is square)
- Drill pilot holes in top, plywood and riser for screws later
- Square table legs on saw
- Sand side panels
- Sand table legs
- Sand plywood pieces
- Sand top
- Sand lattice pieces
- Sand top trim
- Sand riser
- Sand drawer parts
- Stain legs – India ink black
- Stain sides – India ink black
- Stain plywood – India ink black
- Stain top – India ink black
- Stain lattice pieces – India ink black
- Stain drawer front – India ink black
- Stain drawer slides – India ink black
- Stain drawer sides, back, bottom – China red (matches coffee table)
- Stain top trim – China red
- Glue legs, plywood and side panels together to form table base
- Glue drawer together
- Glue lattice
- Glue in top trim
- Finish table base
- Finish table top
- Finish riser
- Finish lattice
- Finish drawer
- Finish drawer slides
- Screw riser to table base
- Screw table top to riser
- Buy 22.5″ X 22.5″ travertine tile/rock slab and insert into table top
- Insert lattice
- Buy 22.75″ X 22.75″ glass stop and insert into table top
- Enjoy
- Sand parts
- Stain parts
- Finish parts
As you can see much remains to be done. Any one of these pieces of work could take several hours to complete and few of them can be done in parallel by me alone. I figure it will be done sometime in 2009. My plan is to update this place with more pictures as soon as anything picture worthy happens. Unfortunately the first thing that will be substantially visually different from what currently exists will be the staining stage and that is still a little ways off. The encouraging thing is that it doesn’t seem to be a horrible piece of shit yet and that with care in the finishing stage it might actually look nice in the living room. Wish me luck :D
– Eric
 Early in 2006 Zach convinced me to go down to the
 The
The